
How to Unlock Bootloader of Infinix Note 3
How to unlock the bootloader on the Infinix Note 3 using ADB and Fastboot. Prerequisites, step-by-step instructions and tips to avoid bricking your phone.

Infinix Note 3 is Candybar, Touchscreen Android Smartphone from Infinix which runs on Android OS, v6.0 (Marshmallow). Infinix Note 3 is available in Palm gold, Crystal gray, Champagne Gold, Glossy silver colors and 199 g of weight. Infinix Note 3 has 6.0 inches FHD IPS Capacitive touchscreen display.
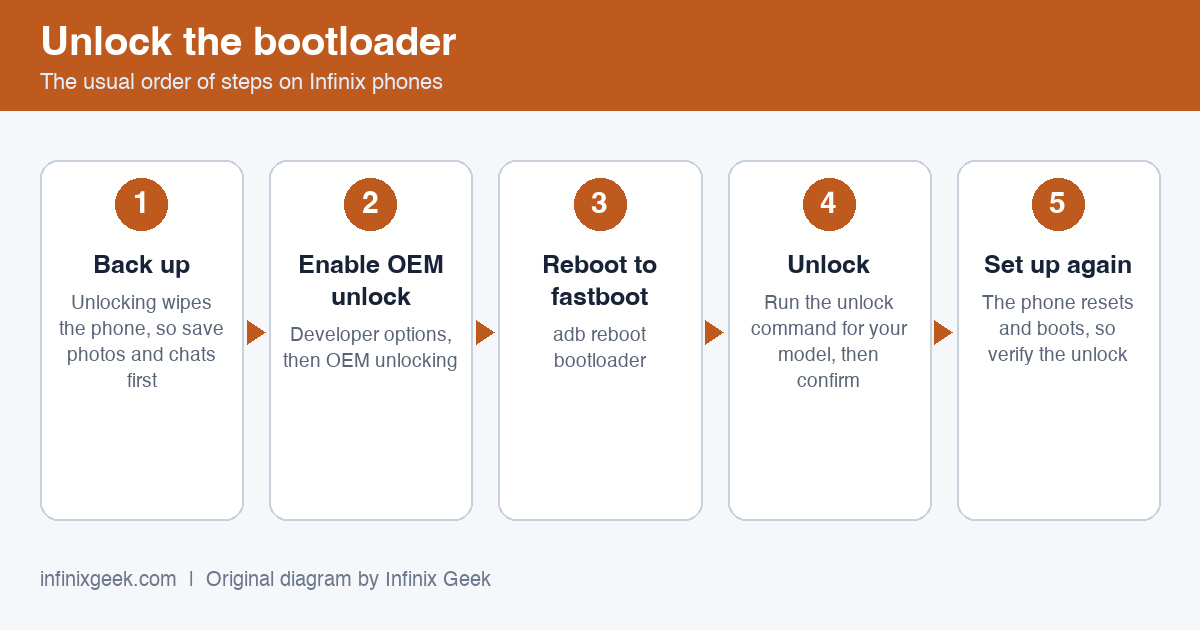
This is a legacy guide written in 2018 for the Infinix Note 3 on its original Android version. We have not re-tested it on current firmware, and it is not meant for newer Infinix phones.
- It wipes your phone. Unlocking the bootloader erases all data. Back up anything you want to keep first.
- It can stop your phone booting and may affect your warranty. Have the stock firmware for your exact model ready before you start.
- Match your model exactly. Check the model code under Settings > About phone. Never flash a recovery, ROM or file made for a different model.
- If an unlock command fails (for example “unknown command” or “FAILED”), stop. Newer phones use
fastboot flashing unlock, older onesfastboot oem unlock, and some firmware does not allow unlocking at all. - Use maintained tools. TWRP builds for these phones are unofficial community ports, and SuperSU is no longer maintained. Magisk is the current root tool.
Infinix Note 3 is powered by 64-bit 1.3 GHz Octa-core processor CPU, MediaTek MT6753 Chipset and ARM Mali-T720 GPU along with 16 GB Storage and 2 GB RAM.
Additional features of Infinix Note 3 are XOS UI, XCharge 3.0. Infinix Note 3 has GPRS, EDGE, 3G, WIFI, Bluetooth, Infrared Port, GPS connectivity options on board. You can take pictures of your beloved ones from its 13 MP camera.
If you are here, then you probably have an Infinix Note 3 smartphone. This guide covers the processes to unlock your smartphone. Before moving to the step by step guide to Unlock bootloader on your Infinix Note 3.
First, let me make things more precise and clear. By unlocking bootloader, you will lose the warranty of your device. So please don’t blame this website or any editor or staff.
So well let’s begin the full guide to Unlock Bootloader On Infinix Smartphone.
If you are always opting to install Root, Custom Recovery or any Custom ROM, then your phone must be unlocked. In this guide, So here is the full guide to Unlock Bootloader of your Infinix Note 3.
Unlocking your Android Infinix Note 3 bootloader is the first step to rooting and flashing custom ROMs. And, contrary to popular belief, it’s actually fully supported on many phones. Here’s how to unlock your Infinix Note 3 bootloader the official way.
Step Zero: Back Up Anything You Want to Keep
Before we begin, it’s important to mention: this process will erase all of your data. So if you have any photos or other files on your phone that you want to keep, transfer them to your computer now. In addition, if you have any app settings you want to keep, use their backup function to create a backup settings file, and transfer those to your computer as well.
Here’s an extra tip: Since I know I’m eventually going to root my phone, I always unlock my bootloader as soon as I buy a new device. That way, I don’t waste time setting it up only to erase the phone in a few days and do it all over again.
If you’re an obsessive Android tweaker who knows you’re going to root soon, consider unlocking before you go through the trouble of setting up your phone.
When you’ve backed up everything you want to keep, continue with the steps below.
Step One: Install the Android SDK and Your Infinix Hot 3 Drivers
You’ll need two things for this process: the Android Debug Bridge, which is a command line tool for your computer that lets you interface with your phone, and your phone’s USB drivers.
- Head to the Android SDK download page and scroll down to “SDK Tools Only”. Download the ZIP file for your platform and unzip it wherever you want to store the ADB files.
- Start the SDK Manager and deselect everything except “Android SDK Platform-tools”.
- After it’s finished installing, you can close the SDK manager.
- Install the USB drivers for your phone .
- Reboot your computer if prompted.
Turn on your phone and plug it into your computer using a USB cable. Open the platform-tools folder in your Android SDK folder and Shift+Right Click on an empty area. Choose “Open a Command Prompt Here”, and run the following command:
adb devices
If it shows a serial number, your device is recognized and you can continue with the process. Otherwise, ensure you’ve performed the above steps correctly.
Step Two: Enable USB Debugging
Next, you’ll need to enable a few options on your phone. Open your phone’s app drawer, tap the Settings icon, and select “About Phone”. Scroll all the way down and tap the “Build Number” item seven times. You should get a message saying you are now a developer.
Head back to the main Settings page, and you should see a new option near the bottom called “Developer Options”. Open that, and enable “OEM Unlocking”
Next, enable “USB Debugging”. Enter your password or PIN when prompted, if applicable.
Once that’s done, connect your phone to your computer. You should see a popup entitled “Allow USB Debugging?” on your phone. Check the “Always allow from this computer” box and tap OK.
Step Three: Boot into fastboot
Turn off your phone and boot into fastboot mode by holding the “Power” and “Volume Down” buttons for 10 seconds. Release them, and you should be in fastboot mode.
Step Four: Unlock Your Phone
Now you’re ready to actually perform the unlock. If your phone is still in fastboot mode, run the command below. If not, turn off your phone and hold the “Power” and “Volume Down” buttons for 10 seconds.
Release them, and you should be in fastboot mode. On your computer, open the platform-tools folder in your Android SDK folder and Shift+Right Click on an empty area. Choose “Open a Command Prompt Here”.
To unlock your device, run this command first:
fastboot flashing unlock
If it returns “unknown command”, your phone uses the older command instead:
fastboot oem unlock
Run only one of them. Your phone will ask you to confirm: use the volume keys to choose Yes and the power key to accept. This erases everything on the phone. If both commands return FAILED, your firmware does not allow unlocking, so stop here.
Check if bootloader is unlocked using the below commands
fastboot oem get-bootinfo
When you’re finished, use the on-screen menu to reboot your phone (or run the fastboot reboot command from your PC). If everything worked correctly, you should see a new message at boot stating that your bootloader is unlocked, and after a few seconds it should boot into Android. It’s important that you boot into Android before doing anything else, like flashing a custom recovery.
Congratulations on unlocking your phone! You won’t notice much of a difference yet, but with an unlocked bootloader you’ll be able to flash a custom recovery , opening the door to root access and custom ROMs.
VERDICT
Unlocking a your Infinix Note 3 bootloader should be done perfectly without any mistake so that it won’t affect the running of the device. Hence, when done with care, you have the chances of installing any preferred package like a new Os and getting privileges over the manufacturer’s limitation.
More Infinix guides
- Before you start: install the Infinix USB drivers and keep the stock ROM handy as a backup plan.
- How to Root Infinix Note 3 | Unlock Bootloader & Install TWRP Recovery
- How to Root Infinix Note 4 Pro | Unlock Bootloader & Install TWRP Recovery
- How to Root Infinix Note 4 | Unlock Bootloader & Install TWRP Recovery
- How to Root Infinix Note 5 | Unlock Bootloader & Install TWRP Recovery
- Root & unlock guides for all Infinix phones